【p5.js】point()とnoise()で作る点描ジュネラティブアート

個人的に点でジュネラティブアートを作る手法が好きで良く使っています。
その方法を簡単に説明していきたいと思います。
点描ジュネラティブアートでかっこいい作品を作っていきましょう。
目次
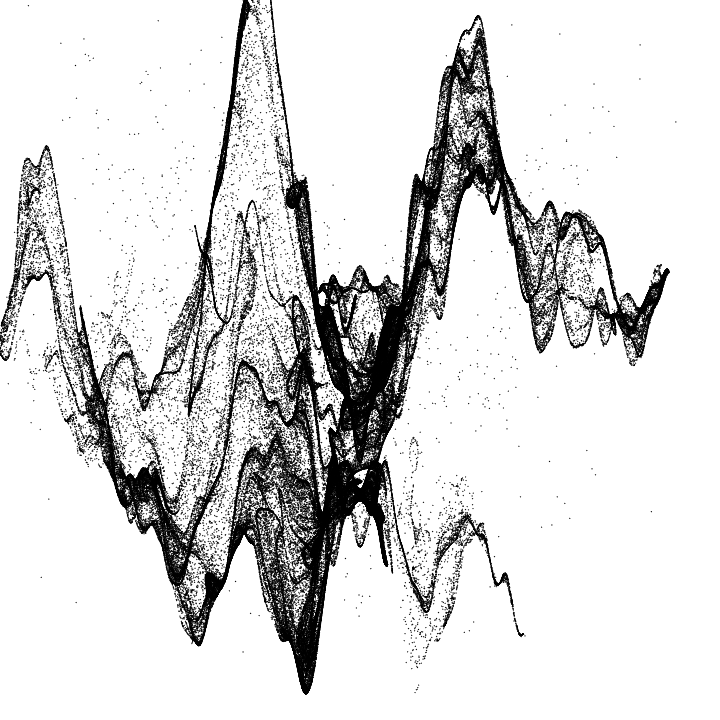
点描ジュネラティブアートの描き方

ソースコードは下になります。
function setup() {
  createCanvas(720, 720);

  background(255);

  const loop_num = 1000;
  const point_num = 300;
  const size_x = 5;
  const size_y = 5;

  const scale_x = width/size_x*1.5;
  const scale_y = height/size_y*1.5;

  translate(width*0.5, height*0.5);

  for(let i=0;i<loop_num;i++){
    let x = random(-1,1) * size_x;
    let y = random(-1,1) * size_y;

    for(let j=0;j<point_num;j++){
      x = size_x * (noise(x*1.5, y*2) - 0.5);
      y = size_y * (noise(x*2, y*1.5) - 0.5);

      point(scale_x*x, scale_y*y);
    }
  }
}
下のコードを一つの描画単位として考え、
point_num個の点point()をノイズnoise()にしたがって描画しています。
現在の座標x, yをnoise()の引数に代入して、新たな座標x, yとして更新します。
点を描画する座標の初期値はrandom(-1,1)を使って設定します。
これをloop_num回繰り返すことで点描ジュネラティブアートが描けたはずです。
ここでは300個の点を描くのを1000回繰り返していますが、点の個数や繰り替えし回数は好みで変えて下さい。
    let x = random(-1,1) * size_x;
    let y = random(-1,1) * size_y;

    for(let j=0;j<point_num;j++){
      x = size_x * (noise(x*1.5, y*2) - 0.5);
      y = size_y * (noise(x*2, y*1.5) - 0.5);

      point(scale_x*x, scale_y*y);
    }
下のコードは設定値になっています。
size_x, size_yを変えると座標x, yの変化量が変わります。
size_x, size_yを大きくすれば、よりノイジーになるはずです。
scale_x, scale_yで描画全体のスケールを調節しています。
これを大きくすれば描画が拡大され、小さくすれば縮小されます。
size_x, size_yとscale_x, scale_yを色々変えて、好みの点描ジュネラティブアートにして下さい。
  const size_x = 5;
  const size_y = 5;

  const scale_x = width/size_x*1.5;
  const scale_y = height/size_y*1.5;
透明度を付ける

点を描画する際の色指定で、透明度を設定し、更に点の大きさを少し小さくして作ってみます。
これによって全体に奥行きが出てよりかっこよくなります。
function setup() {
  createCanvas(720, 720);

  background(255);

  stroke(0, 100);
  strokeWeight(0.5);

  const loop_num = 1000;
  const point_num = 300;
  const size_x = 5;
  const size_y = 5;

  const scale_x = width/size_x*1.5;
  const scale_y = height/size_y*1.5;

  translate(width*0.5, height*0.5);

  for(let i=0;i<loop_num;i++){
    let x = random(-1,1) * size_x;
    let y = random(-1,1) * size_y;

    for(let j=0;j<point_num;j++){
      x = size_x * (noise(x*1.5, y*2) - 0.5);
      y = size_y * (noise(x*2, y*1.5) - 0.5);

      point(scale_x*x, scale_y*y);
    }
  }
}
下の部分で透明度を付けた色を指定し、点の大きさを設定しています。
  stroke(0, 100);
  strokeWeight(0.5);
色を付けてみる

色を付けてみます。
stroke()で一色指定するのもよいですが、点描っぽさを利用して二色で色を付けてみます。
function setup() {
  createCanvas(720, 720);

  background(255);

  const color_pat = ['#1C6DD0', '#000000'];

  strokeWeight(0.5);

  const loop_num = 1000;
  const point_num = 300;
  const size_x = 5;
  const size_y = 5;

  const scale_x = width/size_x*1.5;
  const scale_y = height/size_y*1.5;

  translate(width*0.5, height*0.5);

  for(let i=0;i<loop_num;i++){
    let x = random(-1,1) * size_x;
    let y = random(-1,1) * size_y;

    stroke(random(color_pat) + '60');

    for(let j=0;j<point_num;j++){
      x = size_x * (noise(x*1.5, y*2) - 0.5);
      y = size_y * (noise(x*2, y*1.5) - 0.5);

      point(scale_x*x, scale_y*y);
    }
  }
}
カラーパレットとして変数color_patに配列で青と黒の二色を描画のために用意しています。
const color_pat = ['#1C6DD0', '#000000'];
変数color_patからランダムに選び出し、stroke()で色を指定します。
+ '60'と処理しているのは、変数color_patから選んだカラーコードに透明度を付けるために文字列を付加しています。
stroke(random(color_pat) + '60');
下は別の色での作例です。
色をピンクと黒の二色で描画してみました。

一部を反転する

反転処理を追加するだけでも、かっこよさが増します。
function setup() {
  createCanvas(720, 720);

  background(255);

  const loop_num = 1000;
  const point_num = 300;
  const size_x = 5;
  const size_y = 5;

  const scale_x = width/size_x*1.5;
  const scale_y = height/size_y*1.5;

  push();
  stroke(0, 100);
  strokeWeight(0.5);

  translate(width*0.5, height*0.5);

  for(let i=0;i<loop_num;i++){
    let x = random(-1,1) * size_x;
    let y = random(-1,1) * size_y;

    for(let j=0;j<point_num;j++){
      x = size_x * (noise(x*1.5, y*2) - 0.5);
      y = size_y * (noise(x*2, y*1.5) - 0.5);

      point(scale_x*x, scale_y*y);
    }
  }
  pop();

  push();
  blendMode(EXCLUSION);
  strokeWeight(0);
  fill(255)
  rect(0, 0, width*0.5, height);
  pop();
}
描画の最後にblendMode(EXCLUSION)を使って画面の半分を反転させる処理を追加しました。左半分を反転させています。
詳細の説明はここでは割愛します。
色の反転処理について詳しく知りたい方は下の記事をお読み下さい。
おわりに
点描ジュネラティブアートを紹介しました。
紹介した方法を利用してかっこよい点描ジュネラティブアートをぜひ作ってみて下さい。